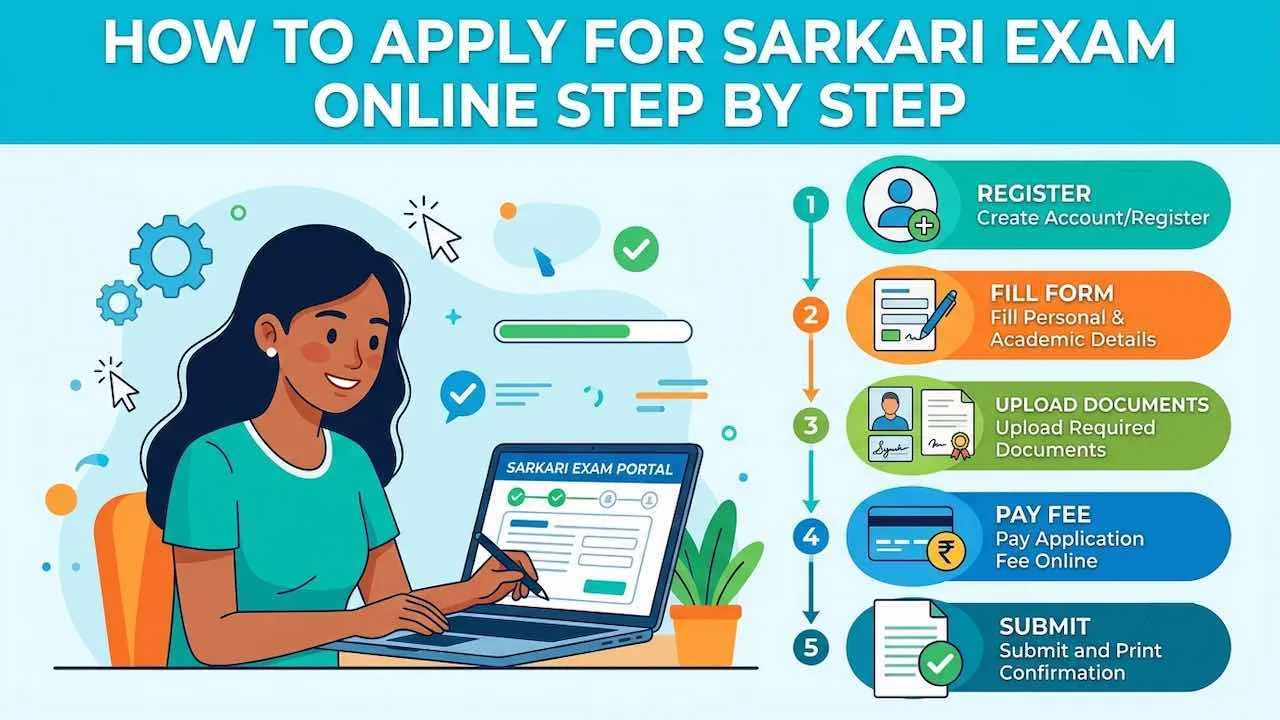
Sarkari exam online apply करने में 5 steps होते हैं: Official website पर registration, application form fill करना, photo और signature upload करना, fee payment और final submission। पूरा process 30 से 45 minutes में complete हो जाता है। नीचे हर step की exact जानकारी, documents checklist, photo specifications और common mistakes सब कुछ दिया गया है। पहली बार apply करने वाले भी इस guide से बिना किसी गलती के form submit कर सकते हैं।
Apply करने से पहले: यह सब तैयार रखें
Form भरने से पहले सभी documents और files ready रखने से process बिना रुकावट complete होती है। बीच में documents ढूंढने पर session timeout हो सकता है और form फिर से भरना पड़ सकता है।
Documents Checklist: Form भरने से पहले यह सब तैयार करें
| Document | क्यों चाहिए | Format |
|---|---|---|
| Valid Mobile Number | OTP verification के लिए | 10 digit, active होना चाहिए |
| Valid Email ID | Registration और communication | Active email, regularly check करें |
| Passport Size Photo | Identity के लिए upload | JPG/JPEG, white background, 10KB से 100KB |
| Signature | Authenticity के लिए upload | JPG, white paper पर black ink, 4KB से 30KB |
| 10th Marksheet | Date of Birth proof | Scan copy ready रखें |
| 12th / Graduation Certificate | Educational qualification proof | Scan copy ready रखें |
| Aadhar Card | Identity और address proof | 12 digit Aadhar number याद रखें |
| Category Certificate | SC/ST/OBC/EWS candidates के लिए | Competent authority से issued, scan copy |
| PwD Certificate | यदि applicable हो | Medical authority से issued |
| Debit Card / Net Banking / UPI | Application fee payment | Active और sufficient balance |
Photo और Signature की Exact Specifications
ये Photo और signature upload में गलती सबसे common rejection reason है। हर exam की specifications अलग होती हैं। नीचे दी गई table से अपने exam की requirement match करें।
| Exam | Photo Size | Photo Dimensions | Signature Size |
|---|---|---|---|
| SSC (All Exams) | 10KB से 100KB | 3.5cm × 4.5cm | 4KB से 30KB |
| UPSC | 20KB से 300KB | Standard passport size | 20KB से 300KB |
| NTA (NEET, JEE, CUET) | 10KB से 200KB | 3.5cm × 4.5cm | 4KB से 30KB |
| IBPS (Bank Exams) | 20KB से 50KB | 200 × 230 pixels | 10KB से 20KB |
| RRB (Railway) | 15KB से 40KB | 3.5cm × 4.5cm | 10KB से 40KB |
| State PSCs | Notification में check करें | Notification में check करें | Notification में check करें |
Photo में white या light background होना अनिवार्य है। Sunglasses, cap या face cover नहीं होना चाहिए। Signature plain white paper पर blue या black ink से करें। Mobile camera से ली गई photo accept होती है यदि quality अच्छी हो।
Major Sarkari Exams की Official Websites
हर sarkari exam का अपना official portal होता है। Third-party websites से apply न करें। हमेशा official website पर ही registration और application करें।
| Exam Category | Conducting Body | Official Website |
|---|---|---|
| SSC CGL, CHSL, GD, MTS, Steno | Staff Selection Commission | ssc.gov.in |
| UPSC CSE, CAPF, NDA, CDS | Union Public Service Commission | upsc.gov.in |
| Railway NTPC, Group D, ALP, JE | RRB / RRC | rrbcdp.indianrailways.gov.in |
| RPF Constable / SI | Railway Protection Force | rpfonlinereg.co.in |
| IBPS Clerk, PO, SO, RRB | IBPS | ibps.in |
| SBI Clerk, PO, SO | State Bank of India | sbi.co.in/careers |
| NEET, JEE, CUET, CTET | National Testing Agency | nta.ac.in |
| India Post GDS | Department of Posts | indiapostgdsonline.gov.in |
| State PSC Exams | Respective State PSC | State-wise official PSC website |
Step 1: Official Website पर Registration कैसे करें
Registration एक बार होती है और उसी account से बार-बार apply किया जा सकता है। SSC में इसे OTR (One Time Registration) कहते हैं। UPSC, NTA और IBPS के भी अपने registration portals हैं।
- Official website खोलें। Browser में directly website URL type करें। Google ads वाली sites से बचें।
- “New Registration” या “Apply Online” पर click करें। Homepage पर यह option clearly visible होता है।
- Name, Date of Birth, Gender और Category भरें। Name बिल्कुल वैसा भरें जैसा 10th marksheet में है। Date of Birth 10th certificate से match होनी चाहिए।
- Mobile number और email ID डालें। दोनों active और accessible होने चाहिए। OTP इन्हीं पर आएगा।
- OTP verify करें। Mobile और email दोनों पर OTP आ सकता है। OTP 10 minutes तक valid रहता है।
- Password set करें और Registration ID save करें। Password में letters, numbers और special characters रखें। Registration ID / Roll Number note करके रखें।
Step 2: Application Form कैसे भरें
Registration के बाद login करके application form भरा जाता है। Form में 4 से 5 sections होते हैं। हर section save करते जाएं।
Personal Details Section
- Father का नाम, Mother का नाम और Date of Birth fill करें।
- Permanent address और correspondence address दोनों भरें।
- Nationality, religion और marital status select करें।
- Aadhar number डालें जो mandatory होता है।
Educational Qualification Section
- 10th board, passing year, marks percentage और roll number।
- 12th board details या Graduation university और degree।
- Marks percentage calculation: Total marks ÷ Maximum marks × 100।
- Appearing candidates “Appearing” option select करें।
Exam Center और Language Preference
- 3 से 4 exam center preferences दी जाती हैं।
- Home city को first preference में रखें।
- Question paper language (Hindi या English) select करें।
- कुछ exams में subject/trade selection भी होता है।
Step 3: Photo और Signature Upload कैसे करें
Photo और signature upload करना form का सबसे critical step है। Size और format गलत होने पर form reject होती है।
- Photo scan करें या mobile camera से click करें। White background रखें। Face clearly visible होना चाहिए, shadow नहीं।
- File size check करें। Photo आमतौर पर 10KB से 100KB के बीच होनी चाहिए। Size बड़ी हो तो online image compressor use करें जैसे compressjpeg.com।
- Signature plain white paper पर करें। Blue या black pen use करें। Signature scan करें या mobile camera से clear photo लें।
- Upload section में Browse / Choose File पर click करें। File select करें और preview check करें। Photo clearly visible है तो confirm करें।
- Preview carefully देखें। Photo और signature blurry नहीं होनी चाहिए। Face पूरा और clearly visible होना चाहिए।
Step 4: Application Fee Online कैसे Pay करें
Application fee payment के बाद form submit होता है। Payment fail होने पर आमतौर पर amount 7 से 10 days में automatically refund हो जाता है।
Available Payment Methods
| Payment Method | कैसे Use करें | Success Rate |
|---|---|---|
| UPI (PhonePe, GPay, Paytm) | UPI ID या QR scan से pay करें | सबसे fast और reliable |
| Debit Card | Card number, expiry और CVV डालें | OTP आने पर verify करें |
| Net Banking | Bank select करें और login करें | Stable internet connection जरूरी |
| Credit Card | Debit card जैसी process | Extra charges लग सकते हैं |
| SBI Challan (कुछ exams) | Challan print करके SBI branch में जमा करें | 1 से 2 days में update होता है |
Fee Payment Fail होने पर क्या करें
- Payment fail होने पर घबराएं नहीं। यह common issue है।
- Bank account check करें कि amount debited हुआ या नहीं।
- Amount debit हुआ है लेकिन form submit नहीं हुआ तो 7 से 10 दिन wait करें।
- Refund न आए तो exam conducting body के helpline पर call करें।
- दूसरे payment method से दोबारा try करें।
- Last date से 2 से 3 दिन पहले payment करें ताकि retry का time हो।
Step 5: Form Preview और Final Submission
Submit करने से पहले पूरा form एक बार carefully review करें। Submit होने के बाद कुछ details change नहीं होती।
- Name spelling 10th certificate से exactly match करें।
- Date of Birth correct है — यह critical है।
- Category correct select की है — General/OBC/SC/ST।
- Photo और signature clearly visible हैं।
- Mobile number और email ID correct हैं।
- Exam center preferences correct हैं।
- सब सही है तो “Final Submit” पर click करें।
- Confirmation page आने पर Acknowledgement Number note करें।
- Confirmation page का printout या screenshot लें।
Form Submit होने के बाद क्या करें
Form submit होने के बाद application process complete हो जाती है। लेकिन exam तक कुछ जरूरी steps बचते हैं।
- Acknowledgement email check करें। Registered email पर confirmation आता है। यह future reference के लिए save रखें।
- Application status track करें। Official website पर login करके status check होती है। “Application Received” या “Under Process” status आनी चाहिए।
- Admit Card download करें। Exam date से 2 से 3 हफ्ते पहले admit card जारी होता है। Official website पर notification आने पर तुरंत download करें। Sarkari exam admit cards की latest updates यहाँ देखें।
- Exam preparation शुरू करें। Form submit होते ही serious preparation शुरू करें। Sarkari exam preparation tips के लिए यह guide पढ़ें।
Mobile से Sarkari Exam Online Apply कैसे करें
Mobile से sarkari exam apply किया जा सकता है लेकिन कुछ बातों का ध्यान रखना जरूरी है।
- Chrome browser use करें, third-party browsers avoid करें।
- Desktop mode enable करें — Settings में “Desktop site” turn on करें।
- Photo mobile camera से ले सकते हैं — white wall background use करें।
- Signature white paper पर करके mobile से scan करें।
- File compress करने के लिए mobile apps जैसे Photo Compress use करें।
- Payment के लिए UPI most reliable है — PhonePe या Google Pay use करें।
- Internet stable रखें — WiFi preferred है, slow data connection avoid करें।
- Payment के time mobile screen lock नहीं होनी चाहिए।
Sarkari exam की latest notifications, results और updates के लिए SarkariExam.center पर regularly visit करें।
Common Mistakes जो Form Reject करवा देती हैं
ये 7 गलतियाँ application reject या exam में problem पैदा करती हैं।
- Name spelling गलत भरना: Name बिल्कुल 10th marksheet जैसा होना चाहिए। “Ramesh Kumar” और “Ramesh Kumaar” में फर्क rejection का कारण बनता है।
- Date of Birth गलत डालना: DD/MM/YYYY format में सही date डालें। 10th certificate से exactly match होनी चाहिए।
- Photo background coloured होना: White या off-white background अनिवार्य है। Coloured, dark या busy background वाली photo reject होती है।
- Photo size limit से ज्यादा होना: 100KB से बड़ी photo upload नहीं होती। Online compressor से size कम करें।
- Wrong Category select करना: OBC candidates ध्यान दें: OBC-NCL (Non-Creamy Layer) select करना है। OBC और OBC-NCL अलग-अलग होते हैं।
- Last date पर apply करना: Server crash होने पर form submit नहीं होता। हमेशा last date से 3 से 4 दिन पहले apply करें।
- Acknowledgement save न करना: Form submit होने के बाद acknowledgement number note करना भूल जाते हैं। Future में status tracking और admit card के लिए यह जरूरी है।
Sarkari Exam Online Apply: अक्सर पूछे जाने वाले सवाल
हाँ, mobile से apply हो सकता है। Chrome browser में desktop mode enable करें। Photo और signature mobile camera से ले सकते हैं। Payment के लिए UPI सबसे reliable है।
कुछ exams में correction window आती है। SSC और NTA exams में form submit के बाद 1 से 2 हफ्ते का correction period मिलता है। Official website पर notification check करें। Name और Date of Birth correction usually नहीं होता।
Payment successful होने पर fee refund नहीं होती। Payment fail होने पर amount 7 से 10 दिन में automatically refund होता है। Fee एक बार pay होने के बाद exam न देने पर भी वापस नहीं मिलती।
File size और format check करें। Photo JPG/JPEG format में होनी चाहिए। Size limit से कम होनी चाहिए। Online tools जैसे compressjpeg.com से size reduce करें। अलग browser try करें।
SSC का OTR एक permanent account है जिससे बार-बार apply किया जा सकता है। एक बार OTR बनाने के बाद हर नई SSC vacancy के लिए personal details दोबारा नहीं भरनी होती। OTR ID और password safely save करें।